Welcome to (The Occasional) Photo Tip of the Day! Please also visit my main site jeffwignall.com. Text and photographs Copyright 2016 Jeff Wignall.


“The best way out is always through.”


Sunday, November 30, 2008

Visit an Indoor Aquarium

If you're like me and you live in the north and you happen to hate the cold weather (you're not one of those people that loves the cold, are you?), then this is the time of year to take your camera to a nice steamy indoor aquarium. I'm fortunate in that I live near the beautiful Mystic Aquarium, one of the best aquariums in the world. But lots of cities around the country have interesting aquariums and they're a great place to spend a day photographing interesting sea creatures.

The biggest problem that you'll run into in aquariums, of course, is the low light level. Flash is little use in an aquarium because you're almost always shooting through glass, so you have to rely on a combination of a high ISO and existing light. Fortunately most aquariums do a great job with dramatic lighting. I shot the image here at Mystic in an indoor tide pool by raising the ISO to 1600 and then resting the camera (gently) on the edge of the exhibit. I had to play around a bit to find an angle that let me pierce the surface glare of the water, but the exhibit was so nicely lit that once I found the right angle, the shot looked totally natural.

One last suggestion is to bring a pad and pen with you so that you can write down the species that you're photographing, that way you can caption your photos better if you post them to an online photo-sharing community. And be sure to contact the webmaster at the aquarium if you get some good shots--they'll probably be happy to post your photos (and they might even trade you future admissions).

Saturday, November 29, 2008

Preserve & Restore Family Photos

Most people today can still look back through several generations of family photos and some of us have family photos that go back nearly to the beginnings of photography. These photos are our window to the past and they are a direct connection to ancestors that we may never have even met. For example, the woman in the photo at right is my maternal grandmother and though I don't recall ever meeting her (though I think I did a young child), I am fascinated in looking at her face and knowing I'm related to her.

The problem is that most of the photos in our albums and framed on living room walls are one-of-a-kind memories. The negatives--if there ever were negatives--are long since lost and the prints we have are often fading and showing sings of damage.

The great news is that you can halt the decline of your family photos and, in fact, preserve and restore them nicely, with very little effort. If you have a flatbed scanner, it takes only a few seconds to scan a photographic print; in a few hours of free time you can probably scan most of your family albums. My suggestion is to start with the earliest photos and get them "digitized" and protected and then move forward through time. Don't worry about restoring each image immediately, just get them into your computer. Be sure to scan them at a good resolution (300dpi or higher) so that you can make quality prints from them later.

As you scan the images, try to title them as accurately as possible with name, date, location, etc. Then, when you finish a night's session, burn those files to a backup cd so that you have digital copies outside of your computer. If you don't own a scanner (and you should, they're under $100--a good holiday gift!), then take your family photos to a local camera shop that will scan them for you while you wait. That way your photos are never out of your sight. Do *not* mail your family photos to a mail-order lab or you may never see them again.

In a future entry I'll talk about restoring your family images--it's easier than you think. If you're interested in learning how to retouch family photos check out Katrin Eissman's excellent book Photoshop Restoration and Retouching.

Friday, November 28, 2008

Practice Your Macro Photography on House Plants

About this time of year I start to really miss my garden and laying on the warm ground in the sun taking close-up photos of my garden plants. One way that I get past this angst is to keep a lot of winter-flowering houseplants in the house so that I have something colorful to photograph and so that I can keep my macro skills honed.

Virtually all digital cameras are very good at close-up photography and most even have a special macro mode for working very close. In fact, many digital point-and-shoot cameras are just as good at close-up photography as much more sophisticated cameras. I have an Olympus camera that will focus down to about a half-inch from the lens!

The key issues in indoor macro photography are lighting and keeping the camera steady. While I sometimes resort to using the built-in flash (as I did for the shot of the clivia miniata shown here), I much prefer the soft light of a north-facing window. The plants may prefer to live in another window, but you can easily move them to whatever window works best for lighting. You can also use a table lamp and often the shade will soften the light nicely. But be sure you set the white balance to "tungsten" so that you don't get an overly-warm color shift.

Keeping the camera steady is especially important in macro work since tiny motions are magnified. If you have a tripod, use it. If not, use the arm of a chair or rest your elbows on a table to keep the camera steady. Steadiness is less of a problem with flash since the flash duration is extremely short and prevents camera jiggle. If your camera has an anti-shake feature, that's great too.

Most flower blossoms last a short time but your prints can keep the flowers alive all winter long!

Thursday, November 27, 2008

Convert Your Digital Photos to Black and White

It's probably been more than 20 years since I shot a lot of black-and-white film, but I miss the look a great deal. So the minute I discovered that you can use image-editing software to convert color images to black-and-white images, I was hooked. (Interestingly, all digital images are actually recorded in black-and-white and then converted to color by your computer.)

Converting your images to black-and-white can be easy or complicated depending both on the type of editing software you have and just how particular you are about the quality. Photographers who have had extensive experience working with black-and-white films and making their own darkroom prints tend to be much more picky about quality (including myself).

Most software programs have several options and the most basic of these is to simply convert the image to gray scale which just transforms the image from color to monotone. Another method is to "desaturate" the color using the hue-and-saturation tool which, in effect, drains the color out of your pictures. The fun thing about that method is that you can do a partial-desaturation (or even a selective one, choosing to desaturate individual colors), so that the image has a faded-color look. And in the current version of Photoshop there is actually a very sophisticated tool for black-and-white conversions. Just check your software manual or help screens to see what options are available to you.

Don't forget, many digital cameras also have a black-and-white shooting mode, so you can actually shoot monotone originals. Look in your camera manual for the menu setting that gets you to the black-and-white mode.

Wednesday, November 26, 2008

Raise the ISO Speed in Low Light

Virtually all digital cameras have a flash that provides instant light in situations when the existing or "available" light is very low. Flash is handy, but it's rarely very attractive. The reason is simple: the light from a built-in flash is coming from the same place that you're standing and it provides a flat, often over-powering light that pretty much erases the mood of the ambient lighting.

Fortunately digital cameras provide an alternative to using flash and that is the ability to raise the ISO speed when you encounter dim settings. The ISO setting is merely a rating of a digital sensor's ability to respond to light and the higher the ISO, the more sensitive it becomes to low light. In the film days you had to buy separate rolls of film for different situations: a low ISO film speed for bright daylight and a faster one, such as ISO 800, for darker surroundings. But digital cameras, bless their little microprocessor hearts, have an "adjustable ISO" that lets you change the ISO speed from frame to frame.

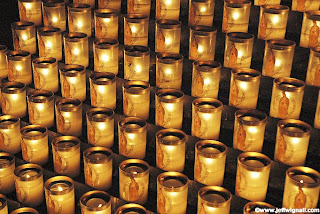
In other words, if you were photographing the exterior of a cathedral in bright sun, you could use a relatively low ISO, such as ISO 100 (the typical default speed of many digital cameras). If you then wanted to move indoors, where the light is extremely low and flash is not allowed (or very desirable), you could raise the ISO high enough so that you can shoot at a safe handheld shutter speed. To photograph the candles in Notre Dame in Paris, for example, I raised the ISO to 1600 (the maximum for my Nikon D70s camera) and was able to shoot handheld at 1/60 second without any need for flash. Had I used flash the candle light would have disappeared and I would have gotten a great deal of glare from the votive glasses.

Incidentally, the benefit of using lower ISO speeds when light allows is that the images are free from digital "noise" which is the grainy-looking appearance that higher ISO settings often create.

Many cameras have an automatic exposure mode (usually the green "A" mode) that continuously adjusts the camera's ISO setting as the light intensity changes. Read your manual to see how your camera handles setting different ISO settings. Knowing how to adjust that setting will provide a lot more flexibility in changing lighting conditions. There is a more detailed explanation of ISO speeds on my main site.

Tuesday, November 25, 2008

Turn the Camera Vertical

Have you ever noticed that most of the photos that people shoot are taken horizontally? Even when the subjects themselves are vertical--things like trees and other people and tall buildings, people try to squeeze them into a horizontal format. In fact, one of the biggest complaints I hear from photo editors at magazines is that even though virtually all magazines are essentially vertical, photographers still shoot more horizontal images.

I think the real reason that most of us shoot so many photos horizontally is because that's how cameras are designed to be held and used. The viewfinder is on the top in the middle, the camera controls are (mostly) on the top of the camera and the LCD on digital cameras is horizontal. But that doesn't mean it's the best orientation in creative terms. Lots of subjects cry out to be framed vertically and they'll seem a lot more balanced and powerful if you let them proudly express their height. So next time you spot a subject that's taller than it is wide, turn the camera 90-degrees and see if things don't look more natural.

By the way, those two saguaro cactus shown here were photographed in Sabino Canyon in Tucson, Arizona and they're two of the most photographed cactus in the state. They look like pals posing for the camera!

Monday, November 24, 2008

Keep It Simple

In my last post I talked about using silhouettes to keep things simple and that got me thinking about the concept of simplicity in general.

There is a tendency in all photographers to try and include everything we see in one frame. It's as if the more we show at one time, the more we'll get our ideas across. Exactly the opposite is true, however: the simpler that you keep your compositions, the clearer your vision becomes. Keeping things simple though requires a thoughtful process of elimination and forces you to look at the image on your LCD and ask one simple question: What don't I need here?

I am particularly susceptible to overloading the frame when I'm traveling in a new place and I'm very excited by the surrounds. While traveling in Iowa recently (perhaps it was the simple surroundings) I decided to force myself to keep my compositions as simple as possible--often just showing a single object in the frame. It was a lot of fun to see how far down I could strip a landscape and still come up with an interesting shot. When I first saw this barn (outside of Des Moines, Iowa), for example, I was thinking of including it in a much wider farm scene. But as I began to eliminate other things like the fields, a small pond, the farmhouse, I began to see that what had really caught my eye was just this wonderful old barn.

When you're photographing any scene, see how many elements you can strip away and still have a strong photo. My guess is that the more you take away and the simpler you make things, the stronger your images will become.

Sunday, November 23, 2008

Simplify Shapes with Silhouettes

I'm always preaching that the fastest way to better photos is to keep things simple. Filling the frame with a single, obvious subject, getting as close as you can and using plain backgrounds are all good paths to simplicity. Another really fun way to make things simple--especially with opaque (non-transparent) subjects that have easily recognizable shapes--is to silhouette them against a bright background.

Silhouettes are really easy to create: simply expose for the bright background and turn the subject into a black shape. If you're using a camera that has an exposure-lock feature, then you can just take a meter reading from the bright area (the sky, a bright wall, etc.) and lock in that reading. Then recompose the shot and shoot at that exposure. If you're using a really simple camera that won't let you lock a meter reading, don't worry, in most cases if the background is extremely bright (like the sunset sky here), the camera will be fooled into exposing for the background anyway.

The brighter and more colorful the background is, the more distinct the shape will be and the more dramatic the contrast. I waited until long after the sun had set to silhouette this giant saguaro cactus near Tucson, Arizona against a twilight sky. I love the transition between the warm glow of sunset and the cool blue twilight sky, but having a fun shape like that cactus in front of the sky is what makes the shot really work.

There is a complete tutorial on silhouettes on my website.

Saturday, November 22, 2008

Make a Political Statement

Photographs have been used to document political and social movements and to voice political points of view since the earliest days of photography. In their hay day, for example, the picture magazines like Life and Look were not only great showcases of photojournalistic talent, but they brought things like poverty, injustice and human suffering home to the living room. The photographs that our great photojournalists devoted their careers to creating were our windows on the good, the bad and the ugly of modern society.

You don't, however, have to be a professional journalist or travel to a war zone to make a political statement with your camera. In fact, you'll find potential subjects for political commentary in virtually every community. A well-captured shot of the local WWII or Vietnam memorial is not only great photo subject, but it will be welcomed by your local paper or community website. A photograph of people being fed at a soup kitchen on Thanksgiving will transform your snapshots to a higher and more serious level of photography. And sometimes potential political subjects just jump out and surprise you. I found this sea of endless flags on hillside in Turners Falls, Massachusetts while on a weekend ramble. Each flag was placed there in memory of a fallen soldier in Iraq. I was devastated--brought to tears--by the site of 3,000 flags on that hillside. I spent an hour wandering the hill, thinking about what the flags meant and shooting dozens of angles. Sad to say that today that number of flags is close to doubling.

The photos that you take can change lives, they can move people's hearts and they can help raise awareness. Don't be afraid to use your camera as a political tool. The photograph, like the pen, is often mightier than the sword.

Friday, November 21, 2008

Find the Beauty in Found Objects

I don't know if it's a blessing or a curse, but I see still life compositions almost everywhere I look. A vase of flowers on the windowsill? Grab the camera. A pile of old tires in the garage? Wow, great shot. I remember spending a half hour shooting a variety of compositions of a flattened rubber dinosaur that I found at the dump once. I'm sure the people at the dump thought I was nuts.

The subject itself doesn't much matter when it comes to making interesting shots out of found objects, it's finding a clever and simple way to present them to your viewer. What attracted your eye to the subject? Was it the combination of shapes? The patterns of light and shadow? Or did the objects seem to define a universal theme? I was drawn to the still life of glasses and silverware at a sidewalk cafe in Paris for all of those reasons--shape, lighting and theme. The minute that I spotted this informal still life I knew that it defined the Paris sidewalk cafe experience for me. I shot the image without even getting out of my seat and I didn't arrange anything: the shot is as I found it (though there's nothing wrong with making adjustments in the subject if it suits your vision). If something strikes you as an interesting gathering of found objects, go ahead and shoot it--you just never know what you might find.

Thursday, November 20, 2008

Turn Reality into Abstraction

As photographers, we're all pretty much hung up on reality. After all, that's what a camera is good at: capturing real things very realistically. Even if you've never been to India, for example, you probably have a pretty clear mental image of just what the Taj Mahal looks like. And even if you've never (lucky you) run into a rattlesnake, you'd know one if you saw it in person thanks to the reality-seeking eye of the camera.

But sometimes it's fun to turn the tables on reality and, in fact, to turn it inside out. All of those tiny bits of things that when combined reveal the whole to us can be dissected from the whole and turned into great abstract compositions. Creating abstraction from reality is easy too: one method is just to close in and frame so tightly that the overall subject is hidden--as I did with this close-up of parrot feathers. Yes, it's easy to tell that it's probably a real parrot, but isolated like this the feathers take on a whole new visual identity. In this view color and shape and texture trump realism. Other ways to capture abstraction include turning the camera upside down, using long shutter speeds to blur moving subjects or even just shaking the camera during a relatively long exposure. Next time you're out shooting, walk away from reality from a few minutes and you may find a brave new vision.

Wednesday, November 19, 2008

Save Camera Batteries: Use the Peephole

Ever since the invention of digital cameras, easily the most popular feature has been the LCD viewfinder. And why not? Instead of mushing your face up against the back of the camera and squinting into the peephole (optical) viewfinder like we did with film cameras (back when dinosaurs roamed the earth), the LCD lets you compose images while holding the camera at a comfortable distance from your face. It's easier to see, you can hold the camera at weird angles (particularly if you have an articulated LCD like I do on my Canon point-and-shoot) and, especially in dark rooms, it's like looking at tiny TV screen.

The problem with LCDs (other than that they are hard to see in bright daylight) is that they drain batteries very fast. The more you use your LCD to compose and review photos, the sooner you'll have to recharge your batteries. So when using the LCD isn't critical, or when you're shooting in bright daylight and the LCD view is hard to see anyway, try going back to using the peephole viewfinder. Some manufacturers have started doing away with optical viewfinders, which in my mind is a mistake--so that's one thing to consider when buying a new camera. If you shoot a lot and take your camera on trips, charging batteries is not always that convenient and that old-fashioned peephole can save you a lot of otherwise wasted battery power.

Tuesday, November 18, 2008

Photograph People at Work

Every day we're surrounded by people at work: men putting a new roof on the house next door, people selling produce at the farmers' market, etc. But how often do you stop and capture these bits of daily life with your camera? In large part all of these people who keep the fabric of our life together go unnoticed and undocumented. We tend to develop a blind spot to everyday events. But the things people do for a living are often quite visually interesting. Recently I had a big old maple tree taken down in my backyard and I got so fascinated watching them work I decided to document their amazing skills (and courage--the tree was nearly 90-feet tall). I probably shot 100 or so images during the several hours that they worked.

Once the tree cutters had the tree down, I went inside, downloaded the images and printed a few of the guy that did most of the cutting. When I have him the print he seemed somewhat shocked. At first I thought he was just surprised that I was able to give him an 8x10-inch print in just a few minutes. But the story was far more interesting: It turns out he'd never seen a photograph of himself at work and--even more incredibly--his mother back in Central America hadn't seen a photo of him in the 12 years he'd been living and working here. I was stunned. In all the time he was living here he'd never had a photo taken of himself to send home.

Of course I gave him prints to send home to her and he was overwhelmed and very grateful. Here I was just trying to pass the time and put some more images into my library and those photos became a connection between a mother and son thousands of miles apart. Everyone has a story to tell, as a photographer it's your job to help them tell it visually.

Monday, November 17, 2008

Expect the Unexpected in Nature

Great nature photos are often the result of brief surprise happenings that no one could predict, and capturing them with your camera is one of photography's biggest challenges. As with most things in life, luck tends to favor those who are prepared and those who are in the right place at the right time. For nature photographers this means two things: be ready to shoot all the time and spend a lot of time observing nature. I was thrilled enough to be getting very close shots of alligators while photographing from a boardwalk in Florida, but when a small reddish dragonfly landed just over the alligator's eye I knew I'd have a unique photo. Fortunately I was already focused on the gator's eye when the dragonfly landed and all I had to do was press the shutter button. (And lucky for me the dragon fly flew away and came back several dozen times, so I got many shots of the unlikely pair.) But the reality is that I was in the refuge with my camera on a nice day and I was prepared for this surprise moment. Be prepared: have your cameras out and your shutter finger waiting!

Sunday, November 16, 2008

Immortalize Hometown Icons

"I don't know what to photograph!" I've heard that complaint from almost every student I've ever had in a photo class. It kind of reminds me of when my brother and I were kids and would stare into a full refrigerator and and say, "There's nothing to eat." (To which my parents would say in shock, "The refrigerator is full of things to eat!")

Life is full of interesting subjects to photograph and one of the things I often tell restless students is that you don't need to travel to exotic places to find fun subjects. Think about the town where you live, for example, what are the places that make that town unique? What might seem mundane to some--the pizza joints, the old factory mills, the local baseball park--are really icons of passing way of life and they make great subjects. The Cricket Car Hop was a legendary hot dog stand in the town where I grew up and, like a lot of hometown icons, it's since been torn down. I'm so happy that I took time to photograph it when it was still around. Look around your hometown and especially at those venerated institutions (like the hot dog stands) that your kids might never get to see. Take a few hours some Sunday afternoon and start an album of them; when they're gone they're gone, but if you've captured them with a camera, they'll live forever.

Saturday, November 15, 2008

Establish a Sense of Scale

There is no place on earth I'd rather spend time taking pictures than the American southwest. The spaces are so vast there that, unless you've actually experienced them, they are hard to fathom. And that lack of universal familiarity can be a problem when it comes to trying to share the sense of incredible space and distance in a landscape photo. You must include something of known size--a visual common denominator--in order for your viewers to grasp the enormity of the places you've photographed. Probably the most familiar (and available) scale indicator is another human being. Within a few inches, we all know the approximate size of another person and that immediately gives us a visual point of reference to the overall scale in a particular landscape. In the scene here I included my on-call scale model Lynne and had her walk into the immense openness of this spectacular Mexican Hat, Utah landscape. Without having her as a visual measuring stick it's almost impossible to grasp the enormity of the setting.

Friday, November 14, 2008

Discover Architectural Details

Whenever I teach a class in photography the first assignment I give students is to photograph a piece of architecture. The practical reason I have for doing that is that everyone can find a building easily, while not everyone can find a great sunset or a pretty farm scene at will. Also, buildings don't run away from you the way your pets or other people might. Once you spot an interesting building you're pretty much free to explore it from as many angles as you can think of and in all kinds of different lighting and weather.

While overall views of buildings can be interesting, the real beauty of architecture is in the details. Whether it's the sign that says "Spike" over the doghouse door or the ornate embellishments of a cathedral, buildings are rife with photogenic detail. For example, I spent an entire afternoon photographing just some of the thousands of tiny details on the facade of Notre Dame Cathedral in Paris. The shot of the figure here is just one of several hundred exposures I made. A zoom lens is a great tool for shooting details because the wide settings will let you photograph things like arches and doorways while the telephoto zoom settings will let you snatch more inaccessible details. No matter what the subject, grand or simple, spend some time with your building and watch as its personality and aura change as the light changes in direction, color and intensity.

Thursday, November 13, 2008

Turn Your Scanner Into a Camera

If you have a flatbed scanner attached to your computer then you might not know it but you have one of the world's best digital cameras sitting on your desktop. Your scanner is not only great at copying old photos and documents, but it can take a scan (i.e. a photograph) of anything that you can fit on the platen: an arrangement of seashells, your antique button collection, or even some flower blossoms fresh from the garden. I laid this eggplant blossom on my inexpensive Epson scanner moments after I picked it, turned off the room lights (to get a black background) and scanned it. The great thing about scanners is that, while they can only "see" one surface of your subject, they have incredible depth of field (near-to-far sharpness) so almost everything the scanner sees will be sharp. Wild, isn't it?

Here are some quick tips for success:
  • Scan at a high (300 dpi) resolution so that you can make really nice prints.
  • Keep the glass clean.
  • Turn off the room lights or use a sheet of black paper over your subject to keep the background black.
If you want to see some of the best scanner photos ever made, visit Ellen Hoverkamp's site and you'll see some remarkable and beautiful scanner photos of flowers, veggies and other interesting subjects.

Wednesday, November 12, 2008

Listen to the Light

Whenever the light gets low photographers reach for the flash. And in some low-light situations flash is your only option. But often turning on the flash is like using dynamite to clean out a gutter: it's a bit of an overreaction. Instead, sit quietly for a moment and "listen" to the light around you. Unless you're sitting in complete darkness, light is speaking to you, luring you to its presence--you simply have to be still and hear its call.

It's surprising, for example, how many wonderful photos you'll find just by listening to the quiet light pouring in your north windows; soft, curvaceous and very neutral, window light is the portrait light the masters' used. I found my cat sleeping in the dim but quiet light of a bay window and while I was tempted to pop on the flash, instead I let the gentleness of the north light speak and shot only with existing light. I rested the camera on the arm of a couch to steady it. Light will speak to you, it is there, just perk up your eyes and listen!

Tuesday, November 11, 2008

Take Your Camera Everywhere

Visual stuff happens. Beauty happens. Drama happens. Patterns happen. Nature happens. While it would be nice (photographically, at least) if we could predict when great visual things are going to happen, the best that we can do is to be prepared all the time. As photographers, that means carrying our cameras with us wherever we go. While most of us won't haul the DSLR over shoulders every hour of the day, it's easy to carry a tiny compact digital camera in your purse or jacket and you should. Beauty, drama, patterns, natural wonders--these kinds of things just suddenly appear and how many times have you said, "I wish I had my camera!" The opportunities don't have to be earth-shaking to be worth photographing either. I photographed these oranges in a grocery store in Las Vegas just because I thought the pattern was interesting. It's not the world's most original photo, but had I seen those oranges and not had my camera I know what I would have been saying to myself!

Monday, November 10, 2008

Talk to Strangers

Walking up to a complete stranger--especially in a foreign country--is probably one of the things that people fear most about taking travel pictures. But the truth is most strangers don't mind tourists photographing them at all, as long as you're polite and have a big smile on your face. Trust me, people in Paris or London know a tourist when they see one and I've made some great friends in far-off places by just taking the time to talk to strangers. I'm lucky in that I take after my mother in that respect: she could start a conversation with anyone, anywhere. Even if you don't speak the language, you can learn how to say please and thank you in almost any language and those are the only two words you'll need. Some folks, like this mime that I photographed near Notre Dame Cathedral in Paris is used to being photographed. For a small tip in the umbrella he posed for me at twilight and didn't mind the flash I had to pop on to bring up the light levels. I shot this photo after watching him perform in a plaza for an hour, so he absolutely deserved a "merci" and a tip. Talk to strangers, the pictures you'll get will add a lot of depth to your travel photos!

Sunday, November 9, 2008

Become a Storm Cloud Chaser

While taking pictures during a thunderstorm can be kind of messy (not to mention dangerous), taking pictures just before or just after the storm can create some great photo opportunities. I find that the turbulent mix of storm clouds and sun almost always produces some very intense nature shots. If you can add a harbor or perhaps a nice red barn to the foreground, great, but often just the clouds alone are enough for a dramatic image. These clouds were photographed from a beach on Long Island Sound, about ten minutes from my house, just moments after it stopped raining. I saw the sun starting to pierce the clouds and hopped in my car and drove to the beach. The cloud formations tumbled and morphed for about a half an hour and I shot nearly 200 frames. Photos from that half-hour shoot have shown up in three of my books.

Saturday, November 8, 2008

Entice the Eye with Leading Lines

Lines are like a visual siren song to the eye: where lines lead, the eyes will follow. If you've ever stood beside a long flat road leading off to the horizon, you know that it's almost impossible not to follow the road down to its vanishing point. I think it's just part of our visual curiosity; our brains just need to know the end of the story. Lines are easy to find in most outdoor scenes: fences, roads, a row of sailboats in a harbor. The key to using lines to entice the eye is to find a vantage point the provides a clear view of the lines and then to compose the shot to accent those lines. I photographed these corn rows early one spring near Prairie City, Iowa and shot from the raised road shoulder to get a little bit of height. I love the way the rows just seem to disappear over the hill. In this case the lines themselves became the subject.

Friday, November 7, 2008

Explore the Night

There's no reason that the sunset should signal the end of your picture-taking day. The night is filled with interesting and colorful subjects from city skylines to lighted monuments to glittery neon signs. Light levels are lower at night, of course, but your digital camera can record anything you can see. If you're traveling light (i.e. no tripod), you can just crank up the ISO speed (this regulates your camera sensor's response to light) and keep on shooting. Of, if you're a bit more serious about your work, bring a tripod along and you can use longer exposures for creative effect. I shot the neon sign shown here in Las Vegas using an advanced-zoom camera on a tripod. For lots of interesting ideas on after-dark shooting, see my complete night photography tutorial.

Thursday, November 6, 2008

Prepare for Great Sunset Photos

Unless it's raining or very cloudy there are two visual miracles happening each day: sunrise and sunset. Capturing great sunrise or sunset photos is fun and somewhat easy--after all, nature does much of the creative handiwork for you. But you can improve your sunsets enormously if you "hang" that pretty sky over an interesting and simple foreground. The time to start scouting sunsets is early in the afternoon when you have time to spare; once the sun begins to set, the colorful sky show happens very quickly, so you want to be ready. One trick a lot of pros use is to carry a compass with them so that--even in strange locations--you can predict where the sun will set. Just figure out where west is, find a simple foreground and wait for the drama to begin. For more on sunsets, visit my sunset tutorial.

Wednesday, November 5, 2008

Wait for An Interesting Moment

Whenever you’re taking pictures of people or animals, it pays to wait for an interesting moment or action. If you’re photographing another person, for example, just a tiny gesture—a smile, a wink, a glance—is often enough to turn a snapshot into a very interesting photo. It's true of other subjects, too. In the case of this mute swan, for instance, I followed her through the lens for a long time one foggy morning, waiting for a little moment to happen; when she finally tucked her bill down to her chest and created that gentle heart shape, I shot. These key moments don’t have to be dramatic, they just have to be interesting enough to catch a viewer’s eye.

Tuesday, November 4, 2008

Look for Dramatic Lighting

One of the best ways to jazz up what might seem like an ordinary scene is to capture it when the lighting is unusual or dramatic. After all, your job as a photographer is to “see” things differently and then share those discoveries. Back lighting, for example, is when the light comes from behind the subject. Light from behind creates a glow around your subject—especially when the subject is somewhat light-colored or translucent. I intentionally placed the sun behind this brilliant yellow shrub in Monument Valley, Utah by getting down low and positioning the bush between my camera and the bright afternoon sun.

Monday, November 3, 2008

Zoom in on Interesting Textures

Whether it’s the soft silky sheen of a baby’s fine hair or the rough bark of an old maple tree, lots of subjects have visually interesting textures. By using your zoom lens to close in on just the texture you’ll reveal a side of a subject that most people ignore. Textures are revealed best when the light scrapes across the surface of a subject, coming either from the side or behind the subject. Early morning and late afternoon are the best times to look for surface textures because that’s when the sun is low and skitters across the surface of the earth creating the shadows that reveal textures.

Sunday, November 2, 2008

Watch Horizon Placement in Landscape Photos

Where you place the foreground in a landscape photo has a big impact on how the photo is perceived. Placing the horizon high in the frame (as I did here in this shot of Stonington, Maine) increases the sense of space in the foreground. Conversely placing the horizon low accents the sky. Probably the worst placement is right through the middle because that cuts a scene in half and divides the viewer's attention. Just ask yourself which part of the scene you want to dominate the frame. If you want more emphasis on the foreground, place the horizon high. If you want to show off the sky (in a sunset, perhaps) lower the horizon. Try it, it works.

Saturday, November 1, 2008

Use Patterns to Create Visual Rhythm

Whenever a shape, color or texture repeats itself, it creates a pattern. Patterns make great stand-alone photo subjects because they intrigue the eye; our curiosity gets the best of us and we have to examine them. Ever walk past a spider's web and not pause to examine the intricate architecture? Patterns work best when photographed against a dark or simple background and when the pattern itself becomes the dominant element of the frame. Here I photographed a colorful pattern of lobster floats in Stonington, Maine by contrasting them against the dark stack of lobster traps.