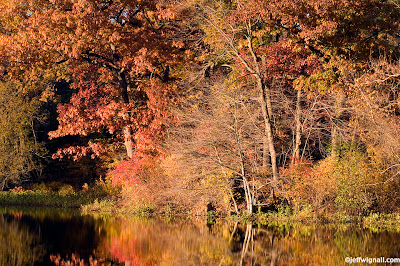
Back in the pre-digital days when I (and most serious photographers) shot mainly color slides, we were always looking for some creative little twist that we could use to make our photos stand out. One trick that someone showed me (I think it was the late Robin Perry, but I'm not certain--in fact, I'm not even certain he's late, but I think so) was using a kind of off-focus trick. The images were created by shooting one sharply focused photo of a subject (on a tripod) and one out-of-focus shot and then sandwiching the two images together and copying them back to one slide. What you ended up with was a picture that was sort of soft and sort of sharp and had a nice kind of plushness to it. It wasn't until recently that I learned that the technique had a name: the Orton Effect (named after a guy named Michael Orton). I should have called it the Wignall Effect back then and I could have claimed it was mine! Or Robin should have named it after himself.
Anyway, these days a lot of people (do a search on Flickr and you'll find a lot of examples) have figured out ways to create the effect in Photoshop. And to be honest, it's pretty simple, but some of the people that are describing it have convoluted it a bit. The best teaching site I've found for it so far is Photoshop Girl (and what a cool name for a site). There is a video tutorial (lots of clicking involved--so yes, you really do click on the things she says to click on) that uses the same technique that I used to create the photo of my kitty Buddha (shown here). The effect is kind of subtle in my shot, but if you click on the image you should see it pretty well. Basically all that you're doing is duping the image a few times, adding a Gaussian blur and changing the blending modes as you go. It's not difficult and there is a lot of room for play in the various steps.
For some reason the technique works better with some subjects than others--and landscape and portraits (animal or human) seem to work very well. Again, do a search on Flickr and or do a Google Image search on "Orton Effect" and you'll see more examples. It's a fun thing to play with on a cold winter night and it doesn't require a new lens or a new camera, just Photoshop and some imagination.
By the way, this is my 489th posting on this blog. Amazing. I'll be at 500 soon and then I think I'll retire it :)
Photo Notes: The photo was made with a Nikon D90 and a 70-300mm Nikkor zoom. Exposure at ISO 200 was 1/60 at f/4 and fill-flash from the built-in flash was used.
Tuesday, December 27, 2011
Saturday, December 24, 2011
Merry Christmas!
little tree
by: e.e. cummings (1894-1962)
- ITTLE tree
- little silent Christmas tree
- you are so little
- you are more like a flower
- who found you in the green forest
- and were you very sorry to come away?
- see i will comfort you
- because you smell so sweetly
- i will kiss your cool bark
- and hug you safe and tight
- just as your mother would,
- only don't be afraid
- look the spangles
- that sleep all the year in a dark box
- dreaming of being taken out and allowed to shine,
- the balls the chains red and gold the fluffy threads,
- put up your little arms
- and i'll give them all to you to hold
- every finger shall have its ring
- and there won't be a single place dark or unhappy
- then when you're quite dressed
- you'll stand in the window for everyone to see
- and how they'll stare!
- oh but you'll be very proud
- and my little sister and i will take hands
- and looking up at our beautiful tree
- we'll dance and sing
- "Noel Noel"
Thursday, December 15, 2011
Mice Sleeping in Sunlight: A Tableau
One of the nice things about having cats in the house is that they are always doing interesting things with their toys. My two cats have about 10 of these "pet" mice and they use them for all sorts of games and ritualistic activities. (One of their favorite games is to gather all of the mice at the top of the stairs and then toss them down--and then chase after them as if the mice have made a run for it.) I found this pair lying on the dining room floor, presumably left there to bask warmly in the sunlight (I have very benevolent cats). At any rate, I thought the sunlight and the shadows created a very fetching image, so I went and fetched my camera and shot about two dozen images from several angles and with a variety of zoom settings. Wildlife photography at its finest: "Smile little mice, the camera loves you!" The cats slept through the entire shoot, oh, well. Little do they know that they designed some of my photos for me.
One funny editing note: There was a thread sticking out of the top of the mouse on the left and I cloned it out in Photoshop (no one wants to see a mouse with a loose thread). But I forgot to edit the thread out of the shadow--look at the red circle here:
That's the shadow I forgot to get rid of. Lesson learned: make sure if you edit out something, you look for it's shadow too! Ahh, well, the mice were just happy not to be getting tossed up and down the stairs. Everyone needs a nap in the sunlight.
Photo Notes: Shot with a Nikon D90 using an 18-70mm Nikkor zoom. Shot with available light and captured in RAW; processed in Photoshop CS3. Exposure was 1/100 second at f/6.3, ISO 640.
Book Notes: If you're going to buy any of my books for Christmas this year, please shop locally--preferably at an independent book store. Amazon has recently released an app that allows you to scan bar codes at the local book store and then buy the book cheaper from Amazon. The net result of that is that you save a few bucks but you put the local store out of business.
Monday, December 12, 2011
How to Handle a White Sky Background
When I processed the images I was pleasantly surprised by how surreal and interesting the background looked. Tino doesn't usually perform in such an outlandish costume, but this year it was part of the show and that, along with the white background, adds some nice color to the shot. By the way, you really can' see it in this shot, but Tino is about 40' or more off of the ground and working without a net--as usual (he never works with a net). I've photographed him at more than twice that height, but it's still a scary feat. And he did a headstand on the chair during the performance--something I'll never get used to seeing.
Incidentally, a quick editing note: Since the background of the blog and the background in the shot were white, I added a thin black line around the frame in Photoshop. That's easy to do: just use the rectangular marquis selection tool to outline the shot, then go to Edit>Stroke and select a pixel width for the stroke (outline). I used a black 3 pixel stroke here--otherwise the shot would have just faded into the page.
Photo Note: Shot with a Nikon D90 with a 70-300mm Nikkor lens. Exposure was 1/160 second at f/7.1. The shot was recorded in RAW and white balance was set to cloudy day (to warm up the shot a bit).
Exposure Book: There is an entire chapter on exposing for difficult subjects in my new book Exposure Photo Workshop, 2nd Edition. It's available on Amazon and at most bookstores. The original edition of the book has been translated to Spanish, Polish, Chinese and both editions are available on Kindle or Fire (you can read both on your iPad with a free app).
Thursday, December 1, 2011
Cool Olympus SP810 In-Camera Effects
I've been doing some more playing with an Olympus SP810-UZ zoom camera that I have on loan from Olympus and I have to tell you that while I still hate only having the LCD to focus with, I'm loving this camera. In my last posting (scroll down, you have to see this) I demonstrated the scope of the amazing 36X optical zoom lens. I'm still having a blast with that lens.
This past Sunday I took a walk around a local pond and experimented with some fun in-camera effects (that I discovered purely by accident while looking at the menus). Two of those effects are show here: the "soft focus" effect at top and then the "reflection" mode below that. There are others too: including a pop art filter (you end up with a purple and black silhouette basically), a fisheye lens effect (which is actually kind of cool), a watercolor filter and five others. These aren't the kinds of things I'd use seriously (I can create them better in Photoshop), but they are still a lot of fun to play around with--and everyone I've shown them too is getting a kick out of them. I thought both filters did a fine job of capturing the mood of an overcast November day in New England.
Too many people take cameras way too seriously. They're supposed to be fun and have an experimental nature to them, I think--that's how you learn what you like and it's also away to just break out of your day-to-day visual limitations. So, for me, discovering weird stuff like this in cameras is just great. Don't let people tell you that "it's just a gimmick" because hey, gimmicks are fun, too. When I was a kid I always wanted a Lite Brite set to play with (and never got one!) and guess what--I still want one! I think I was born being in love with light and color!
Holiday gift idea: If you're looking for something different and easy to buy for a Christmas gift, consider making a donation in someone's name to a worthy cause. One of my favorites is the Elephant Sanctuary in Tennessee. The sanctuary is a non-public refuge where elephants that have been rescued from the circus or from zoos can live out their lives in dignity and peace in a wild and free environment. They deserve nothing less.
Saturday, November 26, 2011
Olympus SP810: Incredible 36x Zoom Lens
I've always had a kind of lustful affection for what they call "zoom" or "superzoom" cameras. After so many years of carrying around a shoulder bag that weighed as much as a medium-sized dog, the idea of having a good-sized zoom lens in a relatively full-featured camera that was small enough to carry in the pocket of a denim jacket has really appealed to me. The first digital zoom camera that I ever had was a Nikon Coolpix 5700 about five or six years ago and I loved that camera, but because it was on loan from Nikon I eventually had to give it back. That was a great camera and it took wonderful photos, but it only had an 8x zoom and while that seemed huge at the time, by today's standards it's kind of tiny--today 12x and even 24x zooms are pretty common.
And then, of course, there is the amazing Olympus SP810-UZ. The "UZ" in the name stands for "ultra zoom" and at 36x, it is all that and more! In 35mm terms, the lens has a zoom range of 24-864mm--and that's a pure optical zoom, this is most certainly not a digital zoom trick! Yes, from super wide to a whopping nearly 900mm lens. A 900mm lens is more lens than most professional sports or wildlife photographers carry. The longest 35mm lens that I own is 400mm and even with a 1.4x tele-extender, that's only 560mm--add on a 1.5x cropping factor for my D90 and you're STILL NOT at 900mm!)
I'll write more about the other features of the camera in future postings, but I've only had the camera a few weeks and I'm still just in awe of that incredible zoom range. The two photos here were taken from the exact same position and both were handheld. The first photo shows an old New England clock tower near my home and if you click on it and blow it up, you'll see the arrow pointing to a small area of the weather vane. The second photo was shot at slightly less than full zoom and while not razor sharp, it's stunningly sharp (and keep in mind, at 900mm there's not a lot of depth of field). And again, both shots were made handheld. The idea that I can handhold a 900mm lens and get sharp photos just blows my mind. In fact, I've been driving all around town photographing the tallest weather vanes I can find and I'm having a blast. I've been sharing the photos on Facebook (friend me!) with hometown friends and we're having a lot of fun taking close-up looks at these tall, tall weather vanes (I'll post a few more later this week).
Yes, there are a few things about the camera that I'm not thrilled with (I'm not a fan of electronic viewfinders) and I wish the camera had a RAW mode. But for a camera that sells about $300 and has a 900mm lens? I'm sold. If you've ever sat in the stands at your kids' football games and wished you could get close-up shots of them--this is the camera to consider.
Read more about the full line of Olympus cameras here.
Book Note: If you're looking for a comprehensive book on exposure, my book Exposure Photo Workshop has just been released. It's fully updated and revised (with hundreds of new photos) and Shutterbug magazine called it "...the best book ever written on the subject."
Wednesday, November 16, 2011
One of My Favorite Poems
I shot this photo a few days ago to demonstrate backlighting in one of my new books and it reminded me of one of my favorite cummings' poems. It's easy to get so caught up in the frustrations and disappointments of life that we forget how beautiful the world around us is. cummings' poem makes a wonderful Thanksgiving prayer--so think about reading it at the table next week:
i thank You God for most this amazing
day: for the leaping greenly spirits of treesand a blue true dream of sky; and for everything
which is natural which is infinite which is yes
(i who have died am alive again today,
and this is the sun’s birthday; this is the birth
day of life and love and wings: and of the gay
great happening illimitably earth)
how should tasting touching hearing seeing
breathing any-lifted from the no
of all nothing-human merely being
doubt unimaginable You?
(now the ears of my ears awake and
now the eyes of my eyes are opened)
by e.e. cummings
Tuesday, November 8, 2011
The Hidden Beauty of Pollination
Monday, November 7, 2011
2011 National Geographic Photo Contest
Think you've got the goods to go eye-to-eye with the big guns? Here's your chance to find out!
It's been a while since I've talked about a photo contest here, but the annual National Geographic contest is too big and too cool to ignore. This is one of the most prestigious annual photo contests in the world and the top prize is $10,000 (plus a trip to Nat'l Geo headquarters and participation in a photo workshop in Washington, DC). One of the three judges for the contest this year is the great photographer Peter Essick who I had the fun of profiling for Outdoor Photographer magazine a few years back. Peter is an extraordinary shooter who has covered the entire planet on ecology stories and just having him lay eyeballs on your photos would be quite a thrill. The other two judges are Tim Laman, Amy Toensing--both incredible Nat'l Geo shooters.
By the way, I wrote a book on how to win photo contests called Winning Digital Photo Contests and you can find it on Amazon and perhaps at your local library. (By the way, since I'm fairly sure the publisher has been screwing me out of royalties on that book, I'd prefer you got it at the library or bought it used so that the publisher gets nothing. There are used copies on Amazon for under $7.) It's a good book to read before entering any contest and, coincidentally, one of the people I interview in the book is a Nat'l Geo photographer who has judged many contests for them. There is an interview with me about the book here.
There is an entry fee of $15 per photo, but let's face it, that's one fast food meal these days. And the fun of participating in a contest will stay with you a lot longer. Yes? Here is a FAQ page.
You never know about photo contests and it's worth the effort to put your work out in the world. If you don't make the effort to show your work to the world, they won't come looking for you. And even if you don't win a prize, millions of people may will your work on the Nat'l Geo site because they put a page up for every photo entered! And how cool is that? Just for entering your photo ends up on the National Geographic website.
(Photo Copyright Craig Wolfrom, all rights reserved.)
Sunday, October 30, 2011
Photographing Monarch Butterflies
I'm very glad that I got the chance (and made the effort) to photograph this monarch butterfly in my garden a few weeks ago. The monarchs migrate through Connecticut in September and it's heartening to see them come each year. I only saw a few this year, but other years I've had a half dozen at a time, so I'm hoping this year was just a fluke and not an indication that their numbers are shrinking. Anyway, yesterday as you probably heard, we had a freak snowstorm here in Connecticut and not only was the tithonia frozen, but I'm sure the butterflies are sunning themselves in Mexico by now--so I'm very happy that I got the shots when I did.
I saw this beautiful monarch feeding on a tithonia (Mexican sunflower, I think some folks call it a "torch" flower) plant in my garden while waiting for the Patriots kickoff one Sunday and decided that I'd better take advantage of the moment. I ended up spending the next two hours photographing just this one monarch and got dozens of really nice shots. He spent so much time feeding that I had time to experiment with different lenses, close-up attachments, flash, etc.
I ended up shooting most of the frames with my trusty 70-300mm Nikkor zoom with a pair of Kenko close-up lens extension tubes. Extension tubes are a great alternative (or addition to) macro lenses. Extension tubes reduce the lens-to-subject focusing distance (by moving the lens farther from the focal plane) but they contain no glass and so, other than soaking up a bit of light, have no negative effects on the image quality. You can buy a set of three for about $180 from B&H and I think they are a very worthwhile investment if you're into close-up photography.
I shot some exposures with flash and some without (a Nikon SB-80 flash unit) and this shot has flash. I try not to let the flash exposure become too obvious, though I think it's fairly well disguised here. One way to control the flash is to use the flash-compensation feature (very simple to use on the SB-80--it operates off a toggle switch on the back of the flash, you just tap it for more or less flash and that is so much easier than the days when I had to figure out flash power in my head) to reduce the flash output. Here the flash was set to provide about a stop less light than the daylight exposure and I also had the camera exposure set (using exposure compensation) to -2/3 stops so that the background would go very black and to keep the orange flower (lit by fairly bright sun) from blowing out. (For some reason my Nikon D90 is very sensitive to yellow/orange and those colors blow out more with this body than they do with some of my other cameras.)
Exposure with flash and bright sun can sometimes be confounding and it took some experimenting to get this right, so don't get discouraged too quickly. It is a very tricky balance to work out--camera exposure, background exposure, flash exposure and all the time you have a moving subject and are working with a only a few millimeters of depth of field. I always work on a tripod in these situations because there is simply no way that you can juggle a camera, a lens, compensation settings for camera and flash and hold a diffuser in front of the flash (I used a piece of white translucent plastic to soften the light a touch) without putting the camera on a tripod. And therein lies one of the secrets of photographing butterflies and other insects: focus on a specific blossom and let the insect come into your shot. I see other photographers chasing butterflies around hoping that, magically, I guess, the composition and background will be perfect and the butterfly will be in the right light and in sharp focus. Dream on. Pick a blossom where the light is right, set your focus (I focus manually on the flower, that works pretty well) and shoot a couple of test exposures. Butterflies, bees and dragonflies tend to come back to the same roosting spots many times, so all you have to do is be patient and wait for them to complete your composition--and they will.
Email list: By the way, I'm going to start (finally!) building an email list so that I can send out a free newsletter (in addition to these blog postings), so if you'd like to be added, just drop me an email at: thejoyofdigital AT optonline DOT net and I'll add you. I'll have a company helping build the list soon, but for now let's try the old fashioned way. Just put "list" in the subject line and I'll know. And, as always, if you have any photo questions, include those.
Photo notes: To recap: Shot with a Nikon D90 body, a 70-300mm Nikkor zoom lens, a Nikon SB-80 flash using a scrap of translucent white plastic (pulled out of a garbage can) to diffuse the flash. On a Manfrotto tripod. I used Kenko close-up tubes, too. Over a two-hour period I shot approximately 150 exposures in RAW.
Tuesday, October 25, 2011
Cool New Lytro Camera: Shift Focus in Editing
It's not that often that a new piece of camera gear comes along that blows my mind, but recently a new camera called the Lytro was introduced that has a feature that is the coolest thing ever: you can change the point of sharp focus after-the-fact in editing. So, for example, if you photograph a couple of guys fishing on a dock by a river with an out-of-focus sailboat in the background and you focus sharply on their faces, you can switch the focus later (during editing) to any other part of the scene--the sailboat in the background, a seagull in the sky, a rock in the foreground, whatever. This could have enormous creative implications when photographing landscapes, for example, because you'd be able to just shoot the scene--and without focusing on anything since the camera has no focusing capability--and then choose what you want to be sharp later on. You have to see this weird little thing in action to believe it--so watch the video. Pop Photo will run a piece on this in their December issue, so I'll talk more about the camera then. There's much to say about this camera and while the camera itself may or may not stand the test of time in the market, but this retro-focus software is bound to change the face of photography--and you'll be among the first to know about it! Watch the video and be prepared to be surprised by this wild new technology.
Friday, October 21, 2011
Where are the autumn colors? (And a few book suggestions)
I haven't had enough time this year to go riding around looking for colors, but there doesn't seem to be much color action here in southern Connecticut. I shot this photo about a mile from my house last year on October 29th, but drove by the pond just yesterday and there's no sign of color. Of course, I get antsy every year waiting for the leaves to turn and I don't know why I should want to rush them along, but just curious how colors are doing elsewhere in the northeast (and around the country). Post a comment if you're north of Connecticut and let me know how the colors are doing. I used to make a big event out of the colors each year and would take off for a week or so in my van, chasing the colors around New England. I just don't seem to have the time (or a new enough car!) to do that these days. I used to fantasize about doing what Steinbeck did in Travels with Charley and just packing up a truck and spending a few months on the back roads (not sure the cats would be too thrilled with the trip, though). Steinbeck's book is a wonderful read, by the way. Years later a guy named William Least Heat Moon spent several months cruising the back roads (the blue highways) and wrote a book about his journey called Blue Highways that is one of the best travel books ever written. If you're looking for a few great travel books to read, those would make a great pairing. And again, please leave a colors comment if you have anything to report.
Photo Notes: This photo was shot with a Nikon D90 with a 70-300mm Nikkor zoom. Exposure at ISO 200 was for 1/40 second at f/11 with +.67 stops of compensation. The scene was recorded in RAW, converted from NEF to DNG and worked in Photoshop CS3.
Thursday, October 13, 2011
Abstract Exposures by Motion & Moonlight
A few days ago I was sitting in my car by the seawall near my home watching fishermen surf casting along the beach. As the daylight faded, a nearly full moon began to rise in the east almost directly behind the fishermen. I hadn't intended to do any photography at the beach but since I've begun working on a new book I keep a camera with me constantly. Within a few minutes the moon had lit up the water in a beautiful silver and blue pattern and I knew I'd end up shooting some photos. But despite how bright the moonlight looked on the water, the exposure timess were still far too long for handheld exposures--even when I raised the ISO of my Nikon D90 to its max of ISO 3200.
I considered getting out a tripod, but with such long exposures and with the fishermen constantly moving, casting, adjusting their lines, etc., I knew that a tripod wouldn't help all that much: the fishermen still wouldn't be very sharp unless I called down to them to stand still (not something they'd be too interested in if a fish hit one of their lines!). Anyway, just as an experiment, I started shooting handheld exposures (mostly of this one fisherman) with the lens resting on my steering wheel. I had to focus on him manually because, as bright as the water looks here, the camera was still having trouble focusing and I was shooting through the windshield (something I would never do unless I was after an abstract image and true sharpness didn't matter).
Rather than try to constrain my exposures to times when he was relatively still, I just ignored his motion completely--in fact, I actually hoped he would move around or jiggle the rod to add to the abstract nature of my experiments. I ended up shooting several dozen exposures of him and another fisherman using exposure times ranging from 1.5 to 6 seconds, with the average being 3 seconds. The lens was almost wide open at f/4.5. As I watched the long exposures pop up on the LCD I began to love the shapes of the soft silhouettes against the very silvery and blue water. During the time I was shooting the fishermen (I shot several exposures of two guys together) would occasionally turn on red and blue LED headlamps (to find lures or bait, etc.) and I tried some exposure with those lights and they're interesting, but the light patterns were a bit distracting. (But those red LED headlamps were giving me some ideas for light painting that I'd love to try someday.)
Anyway, the whole experience became something of a visual ballet and the subjects had no idea they were being photographed. I would just waiting until they were in frame, try to focus at 200 or 300mm in the darkness (it became a challenge as the moon rose higher and the backlighting was less intense) through a somewhat dirty windshield and hope that the length of the exposure and their natural movements would create a fun composition. Surprisingly, most of the frames are interesting and each of them is somewhat unique from the others--their motion, the motion of the waves, the intensity of the moonlight were constantly changing. And yes, I thought of getting out of the car and using the tripod anyway, just to steady the camera a bit, but I was afraid that if they saw me up on the seawall with a tripod it might inhibit their behavior or, worse, get them into a conversation with me--something that usually ends all creative photography. You can't talk to someone in a situation like this and photograph them at the same time. Interestingly, I grew up on this beach and surf casting was a part of my life for years, so I knew the motions and rhythms of the fisherman and could anticipate almost every movement they made.
I'm really happy that I tossed aside my usual obsession with sharpness and experimented using motion and moonlight to create abstract compositions. You can't plan a photo opportunity like this, you have to just watch the world around you and do whatever it takes to turn the moment into something visually different--even if everything that you're doing is technically wrong. Do click on the image to get a better feeling for the inherent motion of the shot.
Photo notes: Shot with a Nikon D90 with a 70-300mm f/5.6 Nikkor zoom; ISO 3200, handheld. Recorded in RAW. White balance was adjusted in the RAW conversion to a cooler color temperature to bring out the blue of the water. The image was sharpened slightly using the unsharp masking tool just to crisp up the water sparkle a bit. A minor amount of cloning was done in the lower right to remove the edge of a cooler on the beach.
Wednesday, October 5, 2011
Steve Jobs: He Gave Us a Digital Rainbow
The world lost the man who was perhaps its greatest genius on Wednesday night: Steve Jobs. Try for a minute to imagine our lives without the desktop computer, without the Apple computer--without the iPad, the iPhone, iTunes--without digital photography. Photoshop, the lifeblood of my work, works on a PC, but it sings on a Mac--it was born to be used on a Mac. It is visual opera on a Mac.
I know for certain that I would not have survived as a photographer had it not been for my sitting down at my first Mac in the early 1990s. I was about to spend a week at the Center for Creative Imaging in Camden, Maine and was required to go to Manhattan (to the Apple education/marketing center) and take a one-day course in operating a Mac. I'd never even touched one before. After one hour at that computer I went out to the hall and called my friend Lynne from a pay phone and said, "I'm buying a Mac." Sitting at that relatively primitive Mac was an incredible experience. For weeks I could barely sleep thinking of the possibilities of learning to edit digitally on this beautiful, colorful and intuitive machine. I've loved every Mac I've ever touched since that day.
There is simply no way that digital photography would have ever flourished the way it has without the Mac. It's no understatement to say that almost every serious photographer in the world uses a Mac. I don't believe I've ever been to a studio (I've been to dozens) that wasn't lined with Macs. Now the computer has left the desktop. The iPad has forever changed the way that books, photography and art are shared and perceived. And all this from the imagination of just two men: Steve Jobs and Steve Wozniak.
Steve Jobs' entire life was an inspiration: when the business world (rather viciously) had written him off as a loser, when the company that he invented was stripped away from him, he didn't give up. The world, the press, were all too happy to label him as a loser, a failure. But he never gave up. Instead, he bought another computer company and breathed his rare genius into that company until it was bought by Apple and Jobs was reunited with his brainchild. He turned Apple into the largest corporation in the world worth over $300 billion. And he never stopped innovating, never stopped creating, never stopped imagining. As photographers, we owe him more than we can ever repay.
If you've never read the 2005 commencement speech that he delivered at Stanford University, stop and read it now. Wherever you are--at work, on the train, sitting at your Mac--read it. Steve Jobs was Picasso and Edison and Einstein all rolled into one very brave and creative individual. From the garage in his parents' home he expanded the Universe--he gave us a digital rainbow that will never, ever fade.
Thursday, September 29, 2011
A Question of Sharpness in the Deep Woods
I took a short hike the other day in a state park about 10 miles from my home, mainly just to scout a stream that leads to a small but very pretty waterfall (this shot is the stream, not the waterfall). I brought a camera, one lens (the wrong one, I think) and a tripod. The place was still as mysterious and pretty as I recall and I spent more than an hour shooting, despite the fact that the sun had already gone below the western ridge and so it was like hiking in very deep twilight at times. There were also more mosquitoes than I had anticipated!
Anyway, as anyone who knows me already knows, I'm not a big spender when it comes to camera gear. That's mostly a financial consideration, by the way, I have nothing against owning great cameras and lenses, but I've rarely had the funds to do that. But there is one thing I demand of most of my photos: ultimate sharpness. And that is why I'm so frequently disappointed by my images: I simply don't own the high-end lenses that I need to do the type of work I know I'm capable of--and it's intensely frustrating at times.
Take, for example, the shot above. I did everything I know how to do to make a sharp photo. I used a moderately heavy-duty tripod, used a fairly good (not great) Nikkor lens, was careful to clean the front glass and the filter and used a self-timer to activate the shutter so that I didn't jiggle the camera (using the timer is a good idea, by the way). And yet, the photo is not nearly as sharp as I'd like. I've examined about two dozen frames from that day and I'm simply not sure where the fault lies. I was shooting at ISO 400, which should not be a noise or quality concern. And for most of the shots (not this one) I shot at a very small f/stop (f/22 on most shots) to get good depth of field and, again, I use a tripod for everything. I rarely shoot without a tripod.
There are several possible things that can make a photo unsharp:
Anyway, perhaps I'm too critical (I'm not) or I just screwed up in some way. But I hate unsharp images. It has been an issue with me since I was 10 years old. I do sharpen images in Photoshop (using the unsharp masking tool, but in a somewhat complex way that a friend showed me) and it helps. But when I look at my old 4 x 5-inch negs and see what real sharpness is, I know when an image falls short. That brings up another issue: sensor size. Bigger sensors are better.
So, I'll continue to fight this battle. And if I win the lottery or if book publishers ever stop screwing me out of royalties (don't ask), I'll buy better gear.
But I know one thing for sure: my next digital SLR will have a full-frame sensor. The bigger the sensor, the bigger the pixel and the bigger the pixel, the less I'll whine about sharpness. Please feel free to leave comments.
I'm thinking of self-publishing my next book, by the way--if you have any experience in ebooks, let me know how you did.
Photo notes: This shot was shot nearly wide open at f/4.5 and so has very little depth of field, but is, oddly enough, sharper than the images shot at f/22 or f/25. It was exposed for 1/6 second at ISO 400.
Anyway, as anyone who knows me already knows, I'm not a big spender when it comes to camera gear. That's mostly a financial consideration, by the way, I have nothing against owning great cameras and lenses, but I've rarely had the funds to do that. But there is one thing I demand of most of my photos: ultimate sharpness. And that is why I'm so frequently disappointed by my images: I simply don't own the high-end lenses that I need to do the type of work I know I'm capable of--and it's intensely frustrating at times.
Take, for example, the shot above. I did everything I know how to do to make a sharp photo. I used a moderately heavy-duty tripod, used a fairly good (not great) Nikkor lens, was careful to clean the front glass and the filter and used a self-timer to activate the shutter so that I didn't jiggle the camera (using the timer is a good idea, by the way). And yet, the photo is not nearly as sharp as I'd like. I've examined about two dozen frames from that day and I'm simply not sure where the fault lies. I was shooting at ISO 400, which should not be a noise or quality concern. And for most of the shots (not this one) I shot at a very small f/stop (f/22 on most shots) to get good depth of field and, again, I use a tripod for everything. I rarely shoot without a tripod.
There are several possible things that can make a photo unsharp:
- Using a poor-quality lens
- Using too small an aperture (even though this provides more depth of field, it may also cause optical issues and most lenses are sharpest at their middle aperture, around f/8 or f/11)
- The camera was jiggled during exposure, even if you are on a tripod (a camera strap blowing in the breeze may have been the issue here, but I don't think there was a breeze)
- Using too high an ISO can introduce "noise" that can soften an image
Anyway, perhaps I'm too critical (I'm not) or I just screwed up in some way. But I hate unsharp images. It has been an issue with me since I was 10 years old. I do sharpen images in Photoshop (using the unsharp masking tool, but in a somewhat complex way that a friend showed me) and it helps. But when I look at my old 4 x 5-inch negs and see what real sharpness is, I know when an image falls short. That brings up another issue: sensor size. Bigger sensors are better.
So, I'll continue to fight this battle. And if I win the lottery or if book publishers ever stop screwing me out of royalties (don't ask), I'll buy better gear.
But I know one thing for sure: my next digital SLR will have a full-frame sensor. The bigger the sensor, the bigger the pixel and the bigger the pixel, the less I'll whine about sharpness. Please feel free to leave comments.
I'm thinking of self-publishing my next book, by the way--if you have any experience in ebooks, let me know how you did.
Photo notes: This shot was shot nearly wide open at f/4.5 and so has very little depth of field, but is, oddly enough, sharper than the images shot at f/22 or f/25. It was exposed for 1/6 second at ISO 400.
Friday, September 23, 2011
So Long Summer, Hello Autumn
I shot this photo the day after Hurricane Irene, near the seawall in Stratford, Connecticut (where I live). It seems like a fitting end-of-summer photo. I love summer, hate winter, and it's always very difficult for me to say goodbye to summer. I'll especially miss summer nights on the porch with my kitties listening to the crickets and other insects, watching them chase big June bugs up the screens and the three of us sitting still-as-a-picture when a skunk comes wandering down the path. Fun nights. And the cats love that I sit out there and experience the night with them.
This was a tough summer for me for many reasons and I don't think I got out of it what I should have. I spent a lot of time in spring gardening and then just let the gardens go. I lost the inspiration, I guess and had to do a lot of writing just to get by. But we only get so many summers in our lives and we should work hard to squeeze the most of each one. The other night the cats and I sat on the porch until 2 a.m. because I just didn't want them to miss the last nights of summer. It was very peaceful.
Autumn is nice, too, and it used to be my favorite season. But it also reminds me that cold winter is coming, that I'll probably run out of oil again, that we'll be snowed in for days, if not weeks at a time. Last winter is a pretty dark memory: more than 10' of snow in southern Connecticut and the cold was relentless. But autumn colors always revive my spirits a bit--they're just so mysterious and beautiful to watch. And there are still quite a few bugs out in the yard even into late October.
I also miss the warm days for shooting photos. I'm about to start a new book and need lots of photos, but haven't been able to afford to travel as I usually do to illustrate a new book, so this will be an interesting challenge. What I need is a week in Key West (home of the eternal summer). It probably won't happen, but that daydream will get me through the shorter days that are coming!
Wednesday, September 14, 2011
The P T Barnum Museum in Bridgeport
I shot this on Saturday in downtown Bridgeport, Connecticut--it's the P T Barnum Museum on Main Street. I don't believe I've ever been in the museum, but drive by it a lot. I was actually downtown to shoot another old building and when I finished there, I took a little cruise around town to see if there was anything else worth shooting. As I came up Main Street I saw the Barnum building glowing in the late-afternoon sun. I've shot a lot of these reddish-colored buildings in various cities and they just seem to glow from within when that late light hits them. I think this building was built in the late 1800s, so this red stone must have been a big thing then. The building, sadly, suffered quite a lot of damage from a tornado on June 24, 2010 and is closed for extensive repairs. Hopefully some organization with very deep pockets will pony up some much-needed money and keep this small corner of Bridgeport's history alive (did you know that P T Barnum was once the mayor of Bridgeport?)
My radio partner Ken Brown and I came up with an idea to rename the city of Bridgeport "Barnumopolis"and I still think it's a great idea. So, if you happen to know the current mayor, just put in a good word for the new name. Barnumopolis! Doesn't that sound better than Bridgeport? Let's start a movement!
Tragically, even without the help of tornadoes, most cities are doing away with all of their best architecture and destroying their own architectural heritage. But you know what Barnum is credited with saying (though I'm told he never said it): "There's a sucker born every minute." If we let them tear down our architectural past, we're the suckers, no doubt.
Photo notes: Shot with a Nikon D90 and an 18-70mm Nikkor zoom. Exposure was (I think) 1/500 at f/10 on a tripod. I shot the image in RAW and it was processed using the Adobe DNG converter and Photoshop.
Questions: If you have any photo questions, I'm happy to try and answer them. If I don't get back to you immediately, write and remind me: thejoyofdigital AT optonline DOT net.
My new book: My new book Exposure Photo Workshop was recently released and it's been called (by Shutterbug Magazine) "...possibly the best book ever written on the subject." If you're looking for an interesting read with hundreds of my photos, I hope you'll give it a look. Thanks!
Friday, September 9, 2011
9-11: In Memory of Peter Hanson
Today's posting is one that I posted originally on 9-11-2010 and tonight I was rereading some of my 9-11 postings (I've run a few) and looking at some related photos and I came across this and decided it deserves re-publishing. One thing you will notice that's different comes up in the final paragraph. Also, I mention another 9-11 photo toward the end of this entry and I will publish that photo again on Sunday. Please take a moment to follow the link to a letter from Peter Hanson's mother below. And by the way, if you're never been to the Statue of Liberty in person (though I'd see her dozens of times, I didn't go out to Liberty Island until a few years ago), make plans to do it this fall--you will never think of America or liberty or 9-11 in the same way again:
As far as I know I didn't know any of the people who died on the airplanes that day, but one was a regular listener to the noncommercial FM radio station where I have done radio for many years (WPKN). Here is the story of that day and a link to a memorial page about him:
I had been up all night writing the previous night and was sleeping (what else is new?) when the planes hit the WTC and my friend Lynne called around 10:30 a.m. and woke me and asked: "Are you watching the news?" And then she told me: "The World Trade Center is gone, the Pentagon has been bombed and there are other planes still in the air that they believe have been hijacked."
I thought she was joking, but I flipped on the local Connecticut TV station and the first thing I heard was the reporter saying he'd just spoken to a person that paid a cab several hundred dollars to drive a car full of people out of the city. Everyone thought the entire city was under attack and they just wanted to get back home.
I was scheduled to do my radio show at 2 p.m. and so I just got up and went to the station. We had no idea what to do but we just kept doing "rip and reads" from the AP and relaying things we heard online on CNN, ABC, etc. We're a small noncommercial station, so we had no reporters anywhere on such short notice. Instead, we just opened the phone lines and let people talk or give us bits of news.
A friend of mine, a good reporter named Ken Best, came and joined me on the air and together we took a lot of calls. Most of the calls were either updating us on what other stations were saying--remember, this was happening live and we were on the air live, there was no delay--and people were calling to sympathize, rant or whatever.
About four that afternoon a regular listener (a guy we call the "Trailer Guy" because he lives in a trailer in the woods and calls whenever I'm on the air) called and told us that his best friend, and a guy that was a regular listener to the station when he was in Connecticut (he grew up here but moved to Massachusetts), was on United Flight 175. His name was Peter Hanson. We took Trailer Guy's call on the air (again, live, no delay) and he told us that he had just received a call from Peter's distraught father. Peter had called his father from the air and said he knew what was happening, knew what had happened to the first plane (United 175 was the second plane that flew into the WTC--the South Tower) and that he was just calling to say, "I love you Dad, goodbye."(I learned later that his parents actually watched live on TV as the plane hit the tower.)
There was utter silence at our end. Suddenly the whole thing became a personal, hometown tragedy and it was right in the room with us. Ken and I were devastated. Or should I say, more devastated.
Peter had his wife and daughter with him and he was taking them on a business trip and then to Disneyland. He was 32. His daughter Christine was two-and-a-half years old and was the youngest victim of 9-11. His daughter was very excited to be going to see Mickey and Pluto. Peter and his wife and daughter died, no doubt, curled in each others arms.
You can read a letter and a memorial from Peter's mother here.
One other odd thing about that day, that has never left me, was that because so many of our neighbors in southern Connecticut commute to New York every day, there were literally hundreds of cars in train stations that were not returned to that night. The police set up security at all the train stations to be sure the cars were left alone. Families went to the train stations and waited for husbands and wives and children, many of whom never came home.
Even today in Manhattan, you will see fading little signs with the photos and names of victims, signs that were posted in the days after the attack. People looking for their loved ones, their friends.
In yesterday's posting I ran a photo of a memorial to 9-11 in Jersey City, New Jersey, across the Hudson from where the towers stood. It is made of a beam of the WTC and is decorated with things that people have left: flags, angels, etc. When you come across this memorial in person, and then look up and see the gap in the skyline, it just about takes you to your knees.
And yet Bin Laden still walks this earth. Let's hope not for long--there is a place in hell waiting for him.
Monday, September 5, 2011
On the Neon Prowl Again...
I've been out on the prowl looking for neon signs again, hopefully to be used in a new book. It's not that easy to find great old neon where I live in Connecticut, but I've always liked this sign in a car dealer's window. I shot it while waiting for Mexican take-out food--the car place is just around the corner from the restaurant. Glad I had the camera with me. I didn't bother to unload a tripod (afraid a cop might ask why I was carrying a big tripod at night in a closed car dealership--you'd be surprised how much suspicion that draws for some crazy reason), but leaned on a handy sawhorse. I shot it with a 70-300mm Nikkor zoom (non-image-stabilized version--wish I could afford one!), but there was plenty of light: shot at IS0 640 1/160 second at f/10. There's an entire tutorial on photographing neon signs on my main site.
By the way, if you're in Connecticut or passing through, the little hole-in-the-wall restaurant is called Milford Pizza and is, oddly enough, a great Mexican restaurant--staffed by a really friendly group of Mexican cooks. It's in a small plaza a block in from the Post Road that you enter from Naugatuck Avenue (yes, by the little Devon Post Office). So that's my restaurant plug.
Here's my new book plug: My new book on Exposure, Exposure Photo Workshop is out and if you're interested in learning more about exposure, I think you'll like the book. It's got more than 300 of my photos and it will help you solve a ton of exposure problems. For under $20 it's a bargain on Amazon, too--it's nearly 350 pages and crammed with info.
Tuesday, August 23, 2011
New Exposure Book on the Amazon Bestseller Lists
Thanks in large part to the publisher (Wiley) doing an email blast about it, my new book Exposure Photo Workshop has made it to bestseller lists on Amazon just a week after it was released. Today it reached the #20 spot among photo books in its print edition and the #4 spot among photo books in its Kindle edition. (Remember, if you have an iPad or some other device, you can read the e-version in full color.) The book is in the top 10,000 books among *all* books on Amazon--and that's something like eight or ten million books. It's really nice to have a book sell this well so soon. Wiley did an amazing job with the design and reproduction and at nearly 350 pages it's quite a nice book. Thanks to my friends Derek Doeffinger, Jennica Reis and Gavin Zau for contributing such great photography to the book. In the coming weeks I'll run some photos from the book here and talk about how they were taken.
And please, if you don't see the book in your local library or bookstore, ask them to order it.
Sunday, August 14, 2011
Boyd Norton's New Serengeti Book
Yesterday I had a wonderful long conversation with my photographer friend Boyd Norton and, as always, it was a very fun talk and I came away knowing much more about the natural world in general and Africa in particular. Boyd is one of the world's foremost wildlife and travel photographers and he has been leading safaris to Africa for more than 27 years. He has a brand new book coming out this fall called Serengeti: The Eternal Beginning and I'm sure it will be a landmark book on the subject. You can watch a trailer for the book here.
The Serengeti is a region of more than 12,000 square miles and is home to the largest animal migration on our planet. As many of you probably know, there is a plan being considered to run a highway right through this primal wonderland and it would spell ruin for the Earth's greatest wilderness. It would also no doubt mean the beginning of the end of tourism in Tanzania which would be a devastating financial blow that would far exceed any gains made by the highway. It's a complicated issue, but you can read more about it on the Serengeti Watch page (where you can also make donations to help stop the Serengeti highway). As it says on that page: "If we can't save the Serengeti, what can we save?"
I'll write more about Boyd's book (and hopefully run a few photos from it) as the publication date gets closer. In the meantime, this is probably the greatest ecological/wildlife issue of our lives, so I hope you'll take time to read more about it.
Thursday, August 4, 2011
My New Book on Exposure Released
My latest book Exposure Photo Workshop (2nd edition) has been released (a week early!) and is now available on Amazon and at Barnes & Noble and is probably in most major bookstores already. This book is a total revision of the previous edition and features more than 100 new photos and virtually every page of text in the book has been updated. The book also features more than a dozen photos by my good friend and world-renowned photographer Derek Doeffinger, as well as photos by two of my former students, Gavin Zau and Jennica Reis. It's a very handsome book and the publisher, Wiley Publishing, did a superb job with reproduction.
There are also several new topics that weren't covered (or were only lightly touched upon) in the original, including High Dynamic Range Imaging (HDRI), an expanded RAW section, details of the latest mirrorless (MILC) digital cameras and much more. I spent nearly four months updating this book and I think it covers the subject of exposure better than any other book on the market. Shutterbug magazine said of the original: "...possibly the best book ever written on the subject." The book is also available as a Kindle edition and, on the first day that it was available, reached the top 100 Kindle photo reference books in the world (just click on the image to go to the Kindle page).
While the book covers the entire topic of exposure, there's nothing in it that will scare off or confuse any photographer--and yet I think it's complete enough to satisfy any advanced shooter. I worked very hard to break the entire subject down into easily understood pieces and every concept and technique is well illustrated. The book is also quite a bit longer than the original and is almost 350 pages long--a bargain for the price these days!
And, as always, if you have any questions about exposure or photography in general, I answer every email so feel free to write. And if I could figure out a safe way to put my email address right here I would--but you can find a contact form on my main site.
Friday, July 29, 2011
Favorite Photos & Places: United House Wrecking
If you're in the Connecticut area and you've never been to United House Wrecking in Stamford, it's worth taking a ride over. I'm a sucker for all things strange and outlandish and that's exactly what this place features--in great quantity. It's a kind of combination of architectural salvage house and antiques gallery and while these days it seems to feature a lot more repro stuff (and less salvage) than it did when I first went there (probably 30 years ago), it's still got a ton of fascinating stuff.
There are, according to their website, more than 2.5 acres of displays (indoors and out) and it's very easy to spend an entire afternoon there just wandering around and you'll find yourself smiling a lot! You'll also find yourself poking your companions and saying, "Wow, look at that, how cool!" Of course, most of the stuff is on the pricey side (how about a pair of Chinese Foo dogs for $40,000?), but there is affordable stuff, too. And these days who cares if you can afford to buy--the place is free to explore and the staff is friendly and what could be more fun on a nice summer day than to wander through acres of weird stuff? Definitely bring your camera, I spent more than two hours on my last visit just shooting snaps in the outdoor display area. Oh, and if you happen to buy those Foo dogs, give me a call, it would be the highlight of my summer to see someone drop forty grand on a garden decoration. I'll put them in my van and help you get them home.
My latest book The NEW Joy of Digital Photography (Lark Photography Book) is full of great tips and hundreds of pretty photos and I hope you'll check it out the next time your in Barnes & Noble. And tell your friends about this blog!
Saturday, July 16, 2011
Favorite Photos & Places: Caramoor
The Caramoor Center for Music and Arts in Katonah, New York bills itself as a "magical" place and for me it has always been that. A former estate, Caramoor combines a very interesting house museum (a sort of Italian country estate full to the brim with antiques), a very large and impressive outdoor music venue and a gathering of small but intensely mystical gardens. The gardens consist of a small sunken formal garden (very nicely kept), a collection of man-made features (like the stairs to a sweet little overlook, above) and some nice wooded paths that trace the perimeter of the property.
I've always loved house museums and formal gardens and while it's nice to take the tours and hear about the history of a place, the thing that I like about Caramoor is that, even when it's not formally open or there's no concert event, you can still stroll the grounds and spend quiet time in the garden. I shot the photo here on a day like that and I don't think that there were more than a handful of other people there. I had a lot of time to look for pretty shots, consider my compositions slowly and just wait for nice lighting. As I was shooting that day I was thinking what a nice place it would be to teach a workshop for an afternoon.
Camoor is about a half hour or so into Westchester from Ridgefield, Connecticut and there is a very popular summer music series going on right now. So, if you're looking for a nice place to spend an afternoon and evening, check out their concert schedule. Tickets for musical events (under a tent) start at under $20 and even the best seats are less than $50 for most shows, so this is not like spending hundreds of dollars for a typical outdoor show (and who has $250 for a concert ticket these days?). They sell food on the grounds, the parking is easy and you can arrive early and enjoy the gardens--it's a nice place!
Saturday, July 9, 2011
Favorite Photos & Places: Flamingo Gardens
I haven't been posting much lately largely because I've had a lot of other issues in my life to deal with and I spent a lot of June getting my veggie garden into the ground. It's too hot in my office (no a/c and it's 90 out!) to write long postings, but I thought that for the next few days or weeks, I'd just post some of my favorite photos and places--in case you're looking for some good vacation destinations and/or photo ideas. Travel (particularly by air) has gotten way too expensive and too annoying for me lately (and I used to love to fly as often as I could), but hopefully that will change and so I still daydream about trips I'd like to make to new places and favorite places I'd like to revisit. OK, let's begin...
This photo of a white ibis was shot at Flamingo Gardens in Davie, Florida, which is a little south and west of Fort Lauderdale. There are about 60 acres of very pleasant gardens and wildlife areas--including a beautiful flock of Caribbean flamingos that you can easily photograph in close-up or as a flock as they gather near the edges of a wildlife pond. I spent a day there photographing and had a terrific time. Yes, it's hot in Fort Lauderdale this time of year, but hey, it's hot here in Connecticut too (see above paragraph!) and this is the cheapest time of year to visit Florida. And there are enough beaches in the area to keep you busy and cool for a week, easily.
By the way, I shot this with a 400mm lens on a Nikon D70 body a few years ago and so with the 1.5x cropping factor the focal length was actually about 600mm. But this ibis, about the size of a seagull, was on the opposite side of the pond. He came much closer to me many times and I could have easily shot it with a shorter lens. By the way, these ibis are wild and can up and fly away whenever they like--their wings are not clipped--but the environment is so nice, hey, why leave a good thing! I'll try to find a cooler place for the next posting.
My latest book The NEW Joy of Digital Photography (Lark Photography Book)has more than 300 of my photos and lots of ideas for photos and places and I hope you'll consider buying it.
Saturday, July 2, 2011
Hey, it's Fireworks Time Again!
(The following is a slightly updated posting that originally appeared on this blog last summer. I'll publish some more fireworks shots and ideas over the next several days.)
Like everyone, I love going to fireworks displays and the bigger the event (and the longer they last), the better. I turn into an instant five year old at the local Fourth of July fireworks and "ooh" and "ahh" at every burst and I'm crushed when they end. I really get a kick out of photographing them, too--though, as usual, I let myself get distracted by photography and shoot far more pictures than I should. In the past few years though I've tried to maintain a balance--half my time shooting, half my time just watching.
There are actually two (at least) different techniques that work for photographing fireworks: in one method you use long time exposures and a tripod and keep the shutter open; in the other you just shoot individual bursts with a handheld camera. I'll cover the former method today and the other tomorrow. Either works fine, but the one I'm going to write about tomorrow is probably simpler and doesn't require a tripod.
Using a tripod and shooting long exposures is the more traditional method of photographing fireworks, I think, and it's the best technique to use if you're trying to include a foreground (as in the shot of New London harbor show here) or when you simply want to fill the shot with lots of different light patterns. It's important to use long exposures and a tripod when the foreground is important because you need time for the darker areas to record. Here’s the basic procedure:
With your camera mounted on a tripod (and I tend to use a relatively wide-angle lens of about 20-28mm in 35mm terms), aim you camera at either the sky (if all you want are the fireworks themselves) or a scene in which the fireworks will play a part. To capture the shot of the harbor, for example, I arrived fairly early and managed to get a shot near the front of the wharf so that I could get the boats and water in the foreground. And at popular events, trust me, getting there early is half of the game.
Once you have a good vantage point staked out, set your camera's exposure mode to manual exposure and set the shutter speed to "B" (which stands for "bulb" so that you can make long time exposures. Set the f/stop to a moderately small aperture (f/8 or smaller on a DSLR). I tend also to set a relatively low ISO speed of around 100 or 200 just to keep the very bright explosions from washing out. You will have to experiment with exposures (checking the LCD) as the night progresses.
To make the actual exposure, use a locking cable release (most digital camera makers offer an electronic cable release that has a locking capability) or a cordless remote to fire the shutter. In terms of composition, you pretty much have to wait for the first bursts to hit the sky to decide how to include both sky and foreground because you never know how high the displays are going to go. I often blow the first few shots because I'm still trying to figure out where the fireworks are going to "land" in the sky and often have to reposition the camera a few times to the exact foreground that I want. Don’t panic though if you think you’ve mis-framed the scene, just write-off the first few frames and make your corrections.
Once you think you've captured an interesting assortment of bursts, close the shutter. At this point I usually check the LCD carefully to see how close I am with both exposure and framing and make whatever adjustments are needed. If the fireworks appear to be overexposing (washing out), either use a smaller f/stop or a shorter shutter speed—or both. If the shots are too dark (usually a good thing because you can brighten dark shots a bit in editing, but it's impossible to bring back detail that isn't there), then open the lens slightly or increase exposure time.
Another trick you can use is to place a piece of black cardboard (or a lens cap if you're careful not to jiggle the camera) over the lens between bursts. I find that if the sky is dark enough, that’s not always necessary. Again though, experiment, check your LCD (the picture, not the histogram which is a complete waste of time in this situation because you ARE going to get highlight spikes regardless) and bracket the exposure factors a bit. There is a lot of exposure latitude here provided you're not overexposing. Don't overexpose!
Next we will look at a simpler, handheld method of photographing fireworks.
Sunday, June 26, 2011
My Father: A Self Portrait
This is a self portrait that my father (he was the person that taught me photography) made, and I'm guessing that he probably shot it in the 1940s. I probably should have run this on Father's Day, but I didn't (I did put it on my Facebook page--and please look for me there if you have a minute). My father first got me interested in photography when I was 10 years old and I wanted to shoot and develop photos of my first cat: a sweet little gray cat named Whiskey that I got from my mother for Christmas. (She hid the kitten in the kitchen on Christmas morning and when I came down I heard meowing and I kept telling her, "I hear meowing!" She said, "No, I don't think so." But the cat kept meowing when it heard my voice and the cat was, as they say, let out of the Christmas bag.)
Whiskey, or Whiskers as we called him sometimes, was my very first photographic subject--and the first subject that I ever printed.
My father had given me an old "620" format camera to use and he developed the first roll of black and white film. He then mixed up some print developer (Dektol!) and some fixer for me and gave me a small electric proof printer that worked by laying the negatives on a sheet of photo paper in a dark room, turning on the proofing machine (which had lights in it) and then developing the prints. He told me that after I put the print in the fixer solution (it was daylight by the way, so we hung black cloth over my bedroom windows) I could turn on the lights. For some reason I don't think I was clear on just how exciting an event that was going to be.
When I turned on the overhead light and saw the first photo I'd ever taken (and the first print I ever made), of Whiskey on the roof of our den, I let out a whoop that probably scared the neighbors several houses away. I couldn't believe it: I was able to take a photo and (after my father "souped" the negatives) was able to make my own prints. I was in another Universe. That the first photo was of a subject that I loved so much made it even more exciting and important. Within a few years my interest grew to the point that my father had to build me a darkroom in the basement and--though I really wasn't aware of it--as we improved it over the years, it eventually became a darkroom most pros would envy. (I had a 4 x 5 Omega enlarger and lenses capable of letting me print 20 x 30-inch prints from 35mm negs and was shooting with, and processing film from, both 35mm and 4 x 5-inch cameras.)
Lately I've been thinking about the gifts that my parents gave me: my father gave me photography and a sense of calmness, my mother introduced me to cats (I've never been given a better gift than the love of cats and other animals) and a sense of humor. (She was, however, almost anything but calm--and I inherited that side, too.) I wish someone in the family had been a good business teacher, but hey, you can't ask for everything. My father did give me one great piece of worldly advice: "Be careful what you get good at, you might be stuck with it for a very long time." Amen.
He also taught me how to bowl, how to sail and that the quickest path to inner calmness was just to forget strife and conflict and move on. Our arguments (and trust me, there were plenty in the 1960s when rock 'n roll and anti-war sentiments ruled my brain) ended the moment they ended: and that was a great gift, too. You argue, you shout about war, you wave your arms around--and then you have a sandwich together. This, to me, is a model for life.
I've always loved this shot of my father and I love the pose. Cool shot, Pop!
Monday, June 20, 2011
Turn On the Flash for Better Outdoor Portraits
The nice thing about shooting portraits outdoors on bright days is that there is plenty of light, but the downside is that bright sunlight often causes a lot of contrast, as well as deep shadows under the eyebrows, nose and lips. It seems kind of ironic, but one of the things that you can do to improve almost all outdoor portraits--particularly on bright, contrasty days--is to turn on the built-in flash. By turning on the flash, you open up these shadows and greatly reduce the contrast. It's important though to try and strike a natural balance between daylight and flash. If the flash is equal to the daylight it looks false and if it's more powerful than the daylight (often a problem on cloudy days) you'll get an over-lighted look.
Some cameras do a great job of balancing the flash any time that you turn it on in daylight, while others have a "flash fill" mode and in that mode the camera will automatically create a realistic balance between daylight and flash. Most DSLR cameras (like the Nikon D90 that I used to shoot this photo) also have a flash-compensation control that enables you to set the flash so that it's output is less powerful than the existing daylight. (Look in your camera's manual for info on the flash-compensation feature.) Knowing how much compensation to use is just a matter of making a quick test shot. I often take one shot with the flash compensation in the neutral position and then adjust from there--usually turning the flash down by a full stop which seems to create the most pleasing balance.
You'll know the best balance when you see it, it will just look and feel natural. Also, since you'll be using flash to light the face(s) you can often do some interesting things with light direction. In this shot of my friend Marcella and her son Hart, I positioned her so that the sun was more or less behind them and that provided a nice rim light on their hair. The flash then provided a nice even light on the face, but left the glowing highlights in the hair--it's a nice look and easy to create.
Funny, but probably the single biggest piece of advice that I give to people shooting pictures of people outdoors is to turn on the flash. And I can't remember the last time that I shot an outdoor portrait without flash, even if I had it dialed down a few stops so that it was just putting a highlight in the eyes. Try turning on the flash next time you're shooting people outdoors and I'm sure that you'll find yourself using it all the time.
Tuesday, June 14, 2011
This Year's Poppies: All Popped Out
I've run a few posts recently showing shots of last year's poppies, but this one was shot this year on Memorial Day. I love coming out to the garden and seeing these bright orange petals just blowing in the breeze, but unfortunately they don't last too long: one good rain and all the petals are gone. Also, these poppies aren't spreading as fast in my garden as I've seen them in other gardens. I may have to plant some more just to keep them going. I'd love to see the whole front of the garden filled with them.
Photographically the only problem that I run into with open poppies is that they are very reflective. If you look just to the right of center you can see little line of highlights that are nearly specular (detail-less) highlights. I shot this frame without a tripod (I was being lazy) and there was a breeze blowing, so I cranked the shutter speed up to 1/1600 second and shot nearly wide open (f/5) to toss the background out of focus.
Two days later, of course, it rained hard and the poppies were all gone: show over. I'm hoping some breeder is working on a poppy that will re-bloom all summer. Either that or I'll have to Superglue the petals back on so that I can enjoy them longer.
Photo note: Shot handheld with a Nikon D90 and a 70-300mm Nikkor zoom; recorded in both RAW and Jpeg simultaneously.
Subscribe to:
Posts (Atom)