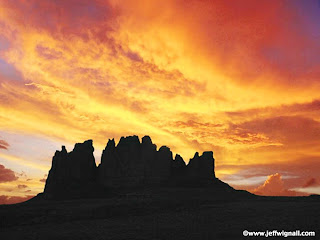
 One difficulty that all landscape photographers run into is that very often you'll find a good foreground subject with a very ho-hum sky. And nothing ruins a good landscape like a boring sky. If you happen to live near a particular scene and can return when the sky is more dramatic, that's fine. But what if you're traveling and find a really great scene but it has a boring sky?
Replacing the sky in a landscape is a pretty simple editing chore and even the most basic programs will let you do it. Even more fun, you can shoot the landscape part of the scene in one locale and the sky from somewhere else. In the scene here, the rock formation was shot in the Valley of the Gods in southern Utah and the sky was shot in Florida! Putting them together in Photoshop took me all of fiftteen minutes.
You really only need two things: a landscape scene that needs a new sky and a good shot of a colorful sky (just the sky, no foreground subjects). To replace the sky you merely select the sky that you don't want using a selection tool (the "magic wand" in Photoshop and Photoshop Elements works best) and delete it. This works best if you have a very simple foreground/horizon shape, as I did with the rock formation. Then you open the shot of just the sky, use the "select all" command (Command A on a Mac, Control A on a PC), use the "copy" command to copy that sky and then use the "paste into" command to past the dramatic sky into the area where the blah sky was. It's much simpler to do than to describe and with a little playing and patience you'll be successful on your first attempts.
There is a very detailed step-by-step tutorial on my site. Start collecting sky shots when you see them (clouds, sunsets, etc.) and save them to give new life to your otherwise great landscapes.


No comments:
Post a Comment