Welcome to (The Occasional) Photo Tip of the Day! Please also visit my main site jeffwignall.com. Text and photographs Copyright 2016 Jeff Wignall.


“The best way out is always through.”


Showing posts with label editing. Show all posts

Thursday, May 28, 2009

Get Extreme with Cropping

Most of us are so used to seeing photos in traditional sizes (5x7, 8x10, etc.) that we are somewhat fearful of cropping images in more radical ways. I think part of the fear is that we imagine other people will wonder if we were just trying to save a bad photograph by giving it an extreme haircut. But so what? If you can take a mediocre photograph and make it a great one by cropping it, then go for it. Besides, other people only notice what's good about a photo, they're not even aware of what you did to make it work.

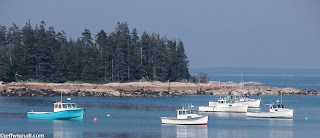
I shot this row of fishing boats in Stonington, Maine and the camera I had with me just didn't have a long enough lens to create the shot I wanted, with the boats in the immediate foreground (I was using an Olympus C5050 back then--one of my favorite cameras of all time). I shot the photo anyway, using a long expanse of harbor as a foreground. But when I looked at the photo in full frame, the boats just seemed lost, it didn't look like I had a plan for the photo at all--so I set the photo aside for a long time. Then a few nights ago I was going through my Stonington folders and I decided to try and rescue the shot by cropping it into a near panoramic format. (I do that a lot, by the way, revisiting photos a year or more later to see if my editing knowledge and skills have improved enough to revive "lost" photo ops.) I think the long horizontal frame really accents the long island and the row of boats nicely and since I didn't blow the photo up to crop it, just removed the foreground, the quality of the long narrow shot is just fine.

Don't be afraid to crop your images to unusual sizes, often just changing the framing a bit can save an otherwise dull photo--or make a good one better.
Thursday, May 21, 2009

Create an Organization System for Your Files

It's amazing how fast a library of digital images can grow. What starts out as a few dozen shots here and a few dozen there suddenly becomes hundreds--and then thousands of images. It's as if they're breeding on their own while you're sleeping. Not only can all of these images clog up your hard drive(s), but just keeping track of where they are can become a logistical nightmare unless you keep a tight grip on organization.

It's essential that you find some means of knowing where your digital images are and that you set up a method of finding them quickly. I've tried several organizational programs (I used to love iPhoto but recent versions are just not reliable and create more problems than they solve) and I've developed a very simple two-step method.

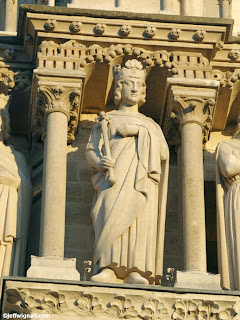
The first thing I do when I download a new set of images from the camera is to put them into a folder that describes the primary subject and date. For the photo here, for example, I created a folder called "Paris, September 2008." Because I use Photoshop and an excellent stand-along Adobe program called the Bridge, all of these folders are alphabetically organized within the Bridge. To find Paris I simply scroll down through the folders alphabetically. Very simple. Because the Bridge and Photoshop are integrated, all I have to do is double-click on the image and it opens in Photoshop.

But within any given folder, of course, there may be several different topics. The "Paris, September 2008" folder might contain images of the Eiffel Tower, Notre Dame, Paris Cafes, etc. So as I download images I also use the Bridge to apply keywords to each image (you can do batch keyworking which makes it very fast). So if I'm in the a Pais folder I can then click on "Notre Dame" and only the images of Notre Dame will show up. If I want to see Notre Dame and the Eiffel Tower, I can search on both keywords at once.

There are a lot of free and inexpensive organizational programs available and it really doesn't matter which one you use if it seems logical to you and if it lets you navigate your files efficiently. The important thing is to create a system early and stick with it. I now have upwards of 60,000 images in my library and as good as my memory usually is, if I didn't organize my files by both folder and keyword, I'd spend half my life looking for images. And nothing is worse than having a client on the phone that wants to buy an image "today" and then having to spend hours looking for it.

Thursday, April 23, 2009

Fade Photoshop Filters for Artistic Control

Here's a really quick and easy tip that provides a simple way to control the intensity of Photoshop filters. Any time that you apply a Photoshop filter to an image and you think it's too strong (or just want to see how it would look if you had use less of the filter), simply go to the edit menu and you'll see an option to fade that filter (it will say "Fade...." with the name of the filter next to it). If you click on that option you'll get a slider that lets you adjust the strength of the filter from 100% (maximum) to 0% (no effect). The option is only available immediately after you apply the filter, however, so you must go immediately to the edit menu after you apply the filter. If you do anything else after you apply the filter, the fade option won't appear.

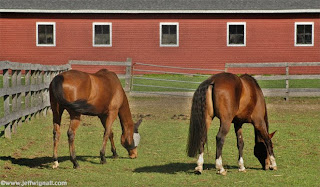
This technique is a great way to tweak filter strength without having to start over again. In photo here, for example, I used a diffuse glow filter (to be honest I'm not really sure what the point of that filter is, but it's worth trying them all, so I do) and then reduced the strenth to about 70%. I use the fade filter option all the time and it's a great time saver.

Friday, January 2, 2009

Crop in the Camera

Cropping your images during editing is easy and it's a fast way to get rid of peripheral clutter or to gently recompose a picture. The trouble is that when you crop in editing you're throwing away pixels and therefore shrinking the size of your image. The more you crop, the less image area (number of pixels) you have to work with.

Since I like to make big enlargements and often sell photos to publishers looking for large images, I prefer to do most of my cropping in the camera. By using your zoom lens to crop in camera you can create a variety of views of a subject and yet each one will contain the maximum number of pixels your camera captures. In other words, you'll have the same full-sized image for each different cropping. Just be sure that as you crop (especially if you're using a variable-aperture zoom lens) that you adjust the f/stop to extend the depth of field (near-to-far sharpness) and keep the entire subject in sharp focus. Remember that as you zoom closer the added magnification reduces the depth of field.