 Digital cameras have come a long way in a very fast time and while photographers once wondered whether digital would ever equal the quality of film, now it's clear that digital images are far superior in many ways. Let's face it, you could never walk into a dimly lit concert setting and "push" your film to ISO 6400 and get the same quality you can get from some professional digital cameras at that ISO speed. Whenever you pushed your film to a higher ISO speed you paid a price with much more obvious film grain--that sandy looking surface pattern that speckled the image.
But interestingly, the lack of that grain in some digital images tends to make digital images look very fake and "too good." Digital sensors have gotten so good at recording low light scenes, in fact, that some of the authenticity of them seems to be gone. Cheaper (and older) cameras typically have more obvious grain than more advanced DSLR cameras but it really depends on the quality of the sensor.
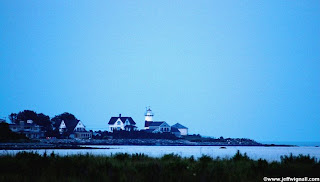
Fortunately, you can easily add noise back into your images to recreate a film look--which is something I do only rarely, but it's still a useful option with certain kinds of images. Low light and twilight scenes, for example, look more real when you add a touch of grain. When I shot this scene of a lighthouse on the Connecticut shore, for example, I was shooting at ISO 1600. On downloading, I was surprised to see that there was virtually no image noise and the image look too clean. Where was the grain I was used to seeing in twilight scenes? Though the image was technically better than a film image, it seemed like it was missing something.
Photoshop to the rescue. By selecting the "Add Noise" filter from the filter menu (Fitlers>Noise>Add Noise) I was able to add noise (or grain if you prefer) back into the shot. The tool is incredibly easy to use--you simply push the slider until you see the degree of grain that you want. Remember though that grain gets bigger in prints as you blow things up, so always add grain with the image at 100% size and make a test print before you finalize the image. And like adding salt to a meal, it's best if you add a little and then increase it if you need more; if you add too much salt (or too much grain) that's all you'll notice.
Who would have thought we'd have to add flaws back into digital images to make them look real?


No comments:
Post a Comment